Author: umb://document/39bc95cf96c2444987b0aae4eab93649
Published: 22 Mar 2021
Featuring as one of the ten artists taking part in our online collection of Abstract Etchings, artists Becky Allen takes us through the 600 year old tradition.
Recognised as a fine art medium from as early as the 15th century, etchings have a long history of challenging the status quo.
From Albrecht Dürer’s revolutionary Knight, Death, and The Devil to Francisco Goya’s controversial anti war series The Disasters of War, the medium has always been used to push the boundaries of contemporary art.
Abstract Etchings explores today’s avant garde artists that are pioneering a new way of working the traditional form.
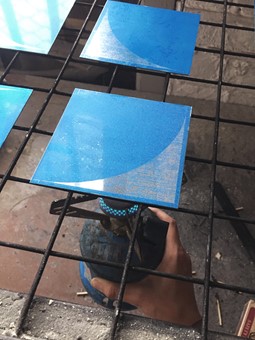
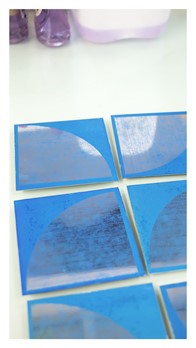
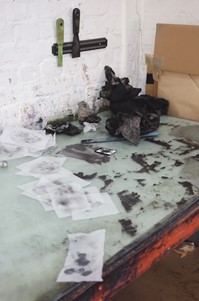
Preparing the Plate
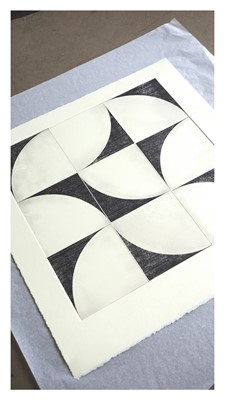
For my two etching editions for the Auction Collective Abstract Etching series, I have used 18 individual zinc plates to comprise 2 individual artworks. Each edition is made from 9 separate plates printed in a 3 x 3 grid. To prepare each plate, the metal has to be cut to size and degreased with chalk before rolling a blue, photo emulsion onto the surface to dry and harden overnight. As both my series’ are photo etchings made from original drawings, the artwork has been printed onto acetate in order to transfer the imagery onto the plates. Each acetate is laid onto an exposure unit so that light will be exposed to the blue side of the plate when the lid is closed. The emulsion on the plate hardens where it receives exposure and will resist acid in the etching process.

Aquatint and Etching
After the plates have been exposed to light, and before I place them in the acid for etching, I remove them from the unit for the aquatint process. To create more texture on the image, I added an aquatint to the plate. This process adds a very fine, light layer of dust onto the plate’s surface which is then heated from underneath to fuse to the plate. To etch the now textured lines created by the photo exposure and aquatint, the plates are allowed to cool down and then placed into an acid solution. For about 15 minutes the acid will bite into the plate and etch the lines of my drawing. The longer the plate is left in the solution, the deeper and wider the line will etch. A feather is used to agitate the bubbles that form on the surface of the plate during this process, which results in a cleaner and better etch.

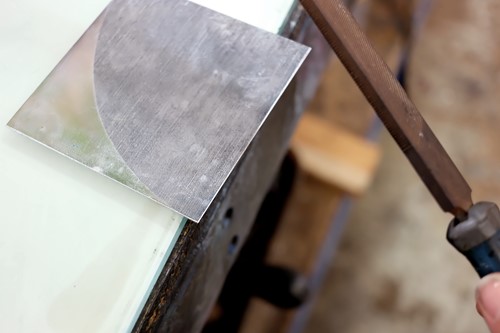
Finishing the plates
After etching the plate, a test print with the photo emulsion left on was rolled through the press to check that the final result. I then removed the emulsion from the plate using a solution of caustic soda and water which reveals the metal underneath and the full image. To neaten the plate before printing the full edition and avoid sharp edges going through the press, I filed the edges at a 45 degree angle. The plates are now ready to ink up and put through the press.
Inking the Plates
For each print, the 9 individual plates are inked up separately using black Charbonnel etching ink which is spread across the surface. The ink is then methodically removed using a series of scrims to gradually wipe the ink excess ink off. This leaves the ink sitting inside the etched lines but removes it from the blank areas. To finish the inking process, tissue paper is used to brighten up the plain areas and a final wiping process using the side of my hand is used to pick up the last of the ink. Using tissue and chalk, the filed edges are also wiped clean as so that there is a clean edge to the border of the print.
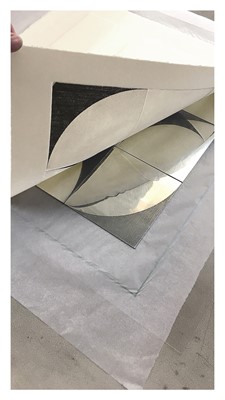
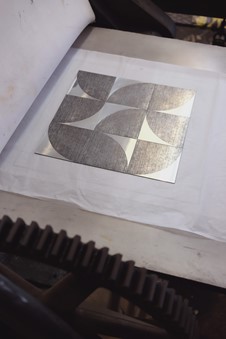
Printing
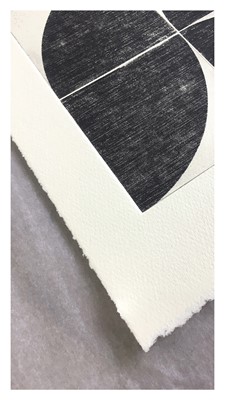
Before printing the paper needs to be prepared by soaking the sheets in a water bath and blotted dry before each print. This softens the fibres of the paper and allows for a clearer print. The inked plates are placed in formation on the bed of the printing press and the blotted paper placed on top. The paper is rolled through the press which acts like an old fashioned mangle. This pushes the plates into its surface, printing the inked image and creating a deboss effect.
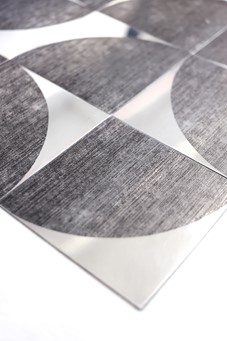
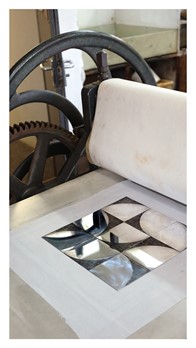
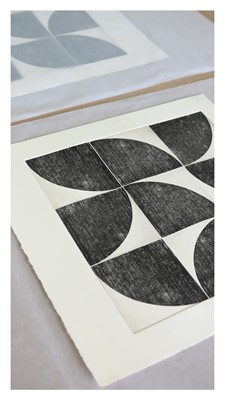
The Final Printed Editions